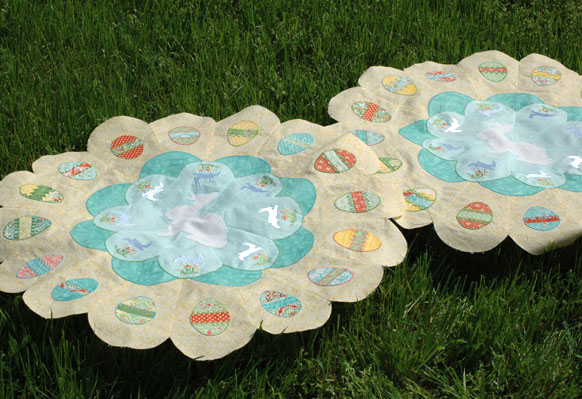
Are you ready to add the central flower-shaped motif to your Easter Table Topper?
The flower will have Inner and Outer Petals and we will applique a big bunny in its center! You’ll need about 1/2 a yard of fabric each for the for the Inner and Outer Petals and a 6” square of white fabric for the Bunny.
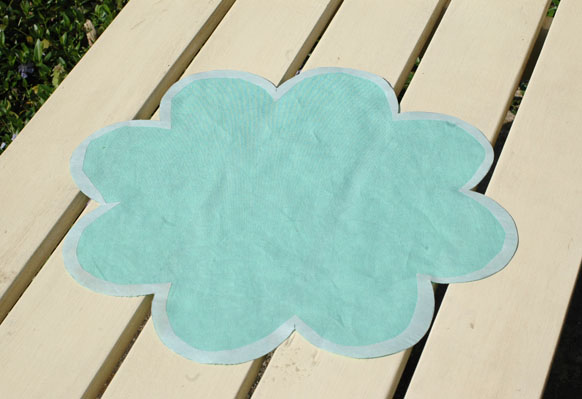
First, print out this Outer Flower Template 4 times and tape it together on the dashed lines. Trace the big flower shape onto paper-backed fusible web. (I used Steam-A-Seam-2 by the Warm Company. If you only have some narrow fusible web you might have to trace it in two halves and that is okay.) Cut out the excess fusible from the center of the shape (there will be a lot and you can use it for another project!) and fuse the remainder onto the wrong side of your Outer Petal fabric.
My Outer Petal Fabric was a lovely feather design in a teal color from
Flora, by
Lauren and Jessi Jung for
Moda. (It looks lighter on the back.) Cut out flower shape along the drawn lines.
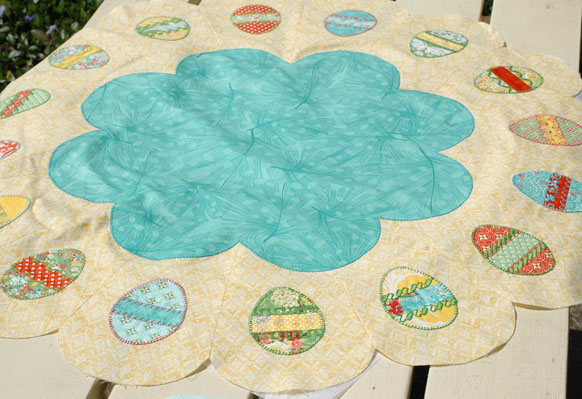
Remove paper and center on your Table Topper, using the seam lines as guides. Fuse. Back with one layer of stabilizer (I used
Sulky Tear-Easy) and buttonhole stitch around the entire flower shape to secure. (I used
Aurifil 12 wt. cotton thread in 1148 teal.) DO NOT tear off the stabilizer!
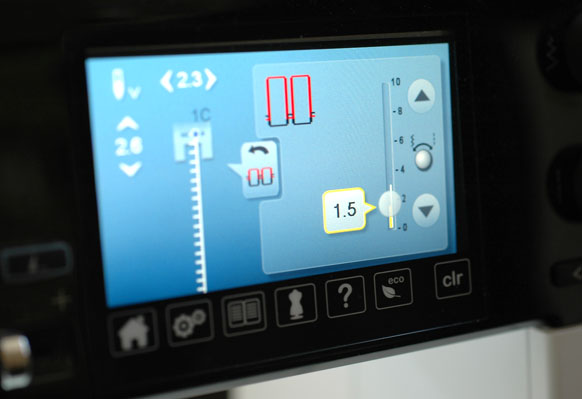
One note about applique stitch. I like to use a buttonhole-style applique stitch with a 12, 24, or 30 weight contrasting thread in many of my applique projects. (I use a 50 wt. cotton in the bobbin.) My favorite is stitch #1329 on my
Bernina. I loosen the top thread tension considerably.
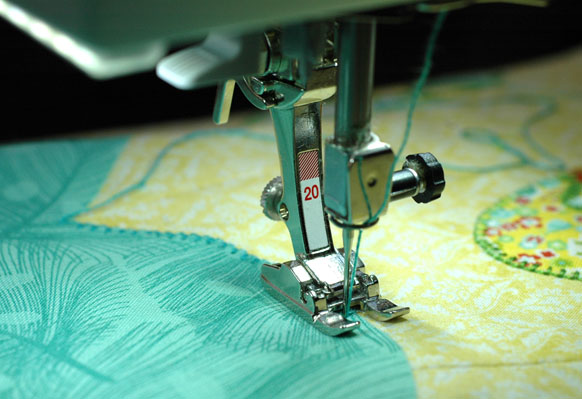
I also really like the small (#20) open-toe foot for applique as I feel it gives me more control over the fabric than the traditional wider open-toe foot. (I did, however, use the wider foot for the decorative stitches on the eggs to take advantage of the full 9mm stitch width.)
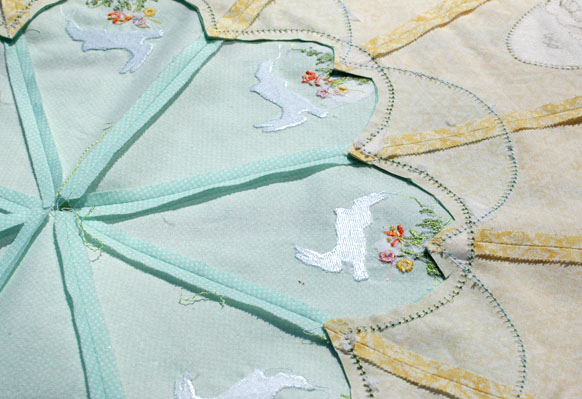
You have two options for the Inner Flower shape. If you have an embroidery machine I have designed a hopping bunny embroidery pattern to stitch on each petal of the flower! To do this, you will actually be stitching out more Dresden Plate blades using your embroidery machine, cutting them out, and assembling them as you did the egg pieces. Eventually this design will make its way to the Bernina site, but in the meantime, feel free to post a message (not anonymously) with the type of file you need at the end of this post and I will email you an .EXP or other type of file.
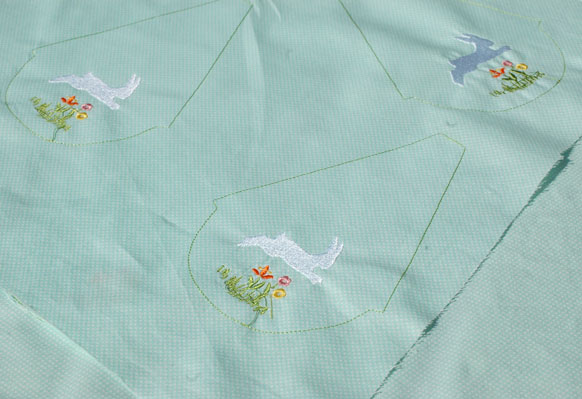
To make the embroidered Inner Petals stitch out the bunny plates 8 times on your Inner Petal Fabric. I used a pretty small scale light aqua dot print from Ruby by Bonnie and Camille for Moda. Start at 1 end of the 1/2 yard cut and work your way down, rehooping for each plate. This allows you to get the motifs pretty close together. You can cut off embroidery pieces as you work your way down the fabric. I used two layers of Sulky Tear-Easy and an array of threads I had on hand: Sulky 40 wt. rayon in 1001 white for the bunny and 1332 green for the grass, Madeira 1965 orange and 1683 yellow for two of the flowers, and Brother 079 Polyester for the third.
Once you are done clip the threads and cut out your plates along the stitched lines.
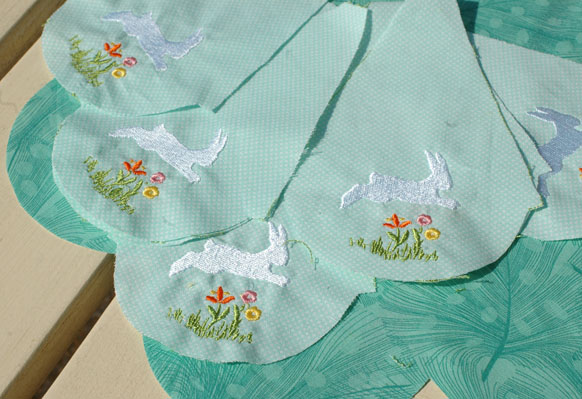
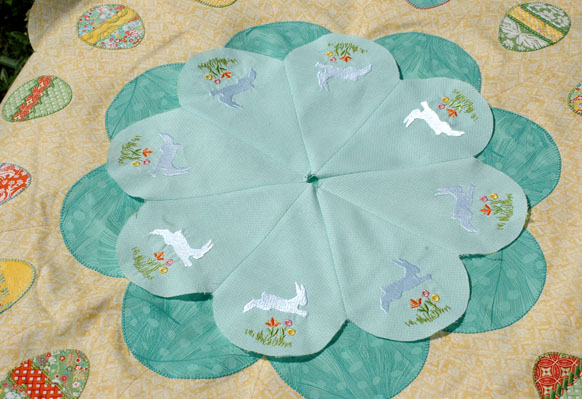
Sew together plates using a 1/4” seam allowance, back stitching on both ends. Press seams open. Spray adhesive on the back and center on the Outer Flower Border shape. (You can also pin or baste or use a fabric glue stick.) I originally designed this Inner Petal shape to be centered in the Outer Petal shape like this….
But once I was actually making the project I preferred the look that resulted when I offset the placement of the Inner and Outer Petals.
What do you all think?
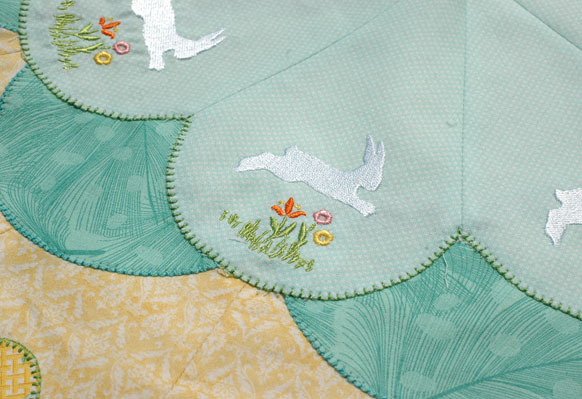
Use a buttonhole stitch around the entire Inner Petal shape to secure. (I used Aurifil 12 wt. cotton thread in 1114 green.) Tear off stablizer and cut excess fabric from behind the Inner Petals, being careful not to clip the Inner Petals themselves!
If you don’t have an embroidery machine you can still make the table topper! Use this template to print out the Inner Petal Shape. Tape the shapes together along the dotted lines and trace onto paper-backed fusible web. Cut out the excess fusible from the center of the shape and fuse the remainder onto the wrong side of your Inner petal fabric. Cut out. Remove paper and center on your table topper. Fuse. Back with stabilizer and buttonhole stitch around flower to secure.
Tear off stablizer and cut excess fabric from behind the Inner Petals, being careful not to clip the Inner Petals themselves.
Now it is time to add your bunny! Trace this template onto paper-backed fusible web. If your are sewing the non-embroidered version you might want to enlarge the printout to 120%. Cut out the excess fusible from the center of the shape and fuse the bunny shape onto the wrong side of your outer white bunny fabric. Cut out. Remove paper and center on your Table Topper. Fuse. Back with stabilizer and buttonhole stitch around the entire Bunny to secure. (Again, I used Aurifil 12 wt. cotton thread – this time in 2024 white.) Tear off stablizer and cut excess fabric from behind the Bunny, being careful not to cut him!.
That is it! If you just can’t wait to get a start on finishing this topper the next step will be layering it on top of backing fabric and batting and quilting as desired.
Happy sewing!
Amanda
P.S. For those of you who might have missed the first installments for this project, Part 1 can be found here, Part 2 can be found here, and Part 3 can be found here…