Spring Quilt Market 2016

Posted on 159 Comments

NOTE: The winners of this giveaway are Donna B. and Roberta Lottino, both of whom who liked Plume!  Congratulations, ladies – send me your snail mails please.  I’m sorry I don’t have more precuts to give to all of you, but we’ll have another giveaway later this summer! 

Hi everyone!  I haven’t blogged in SOOOO long!  It has been busy here with (in the spirit of Quilt Market) secret sewing stuff, but I’m finally getting around to writing about what I have been working on.  Since pictures speak louder than words I’ll try to keep words to a minimum.

Market01
My booth at Spring 2016 Quilt Market…

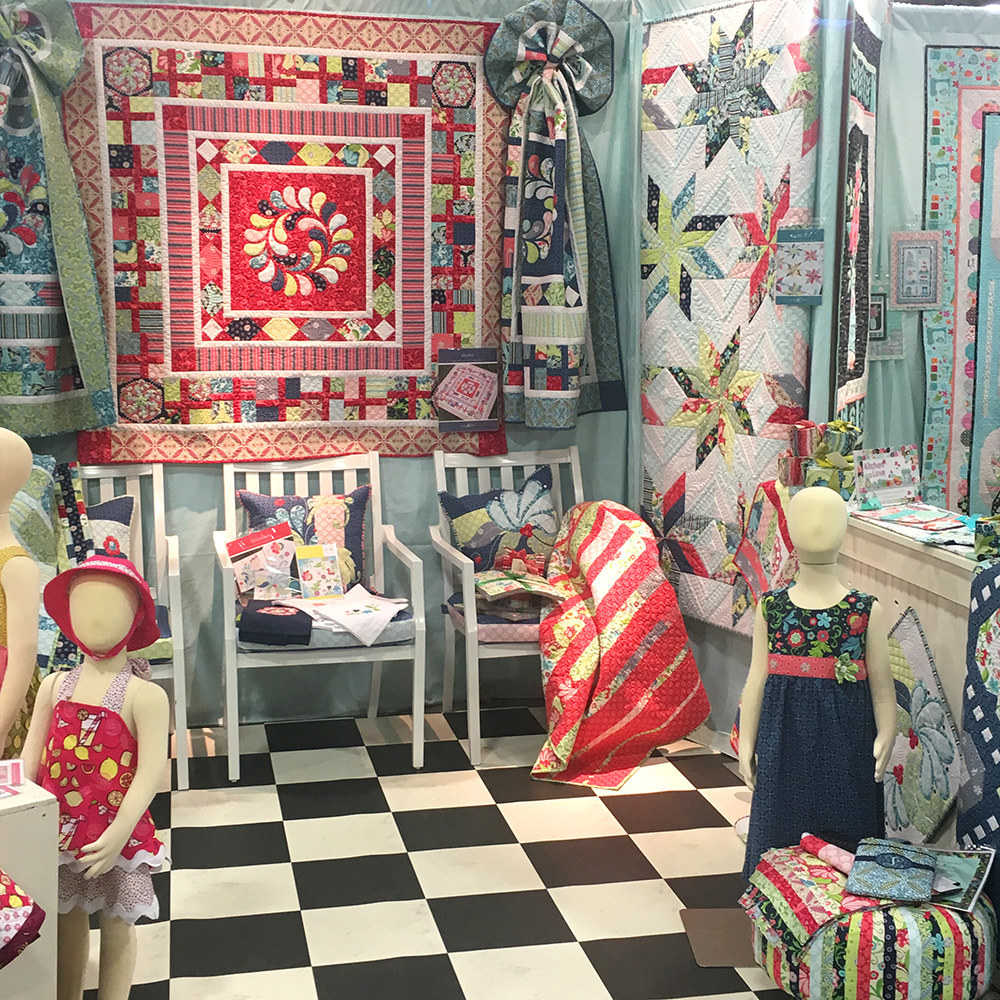
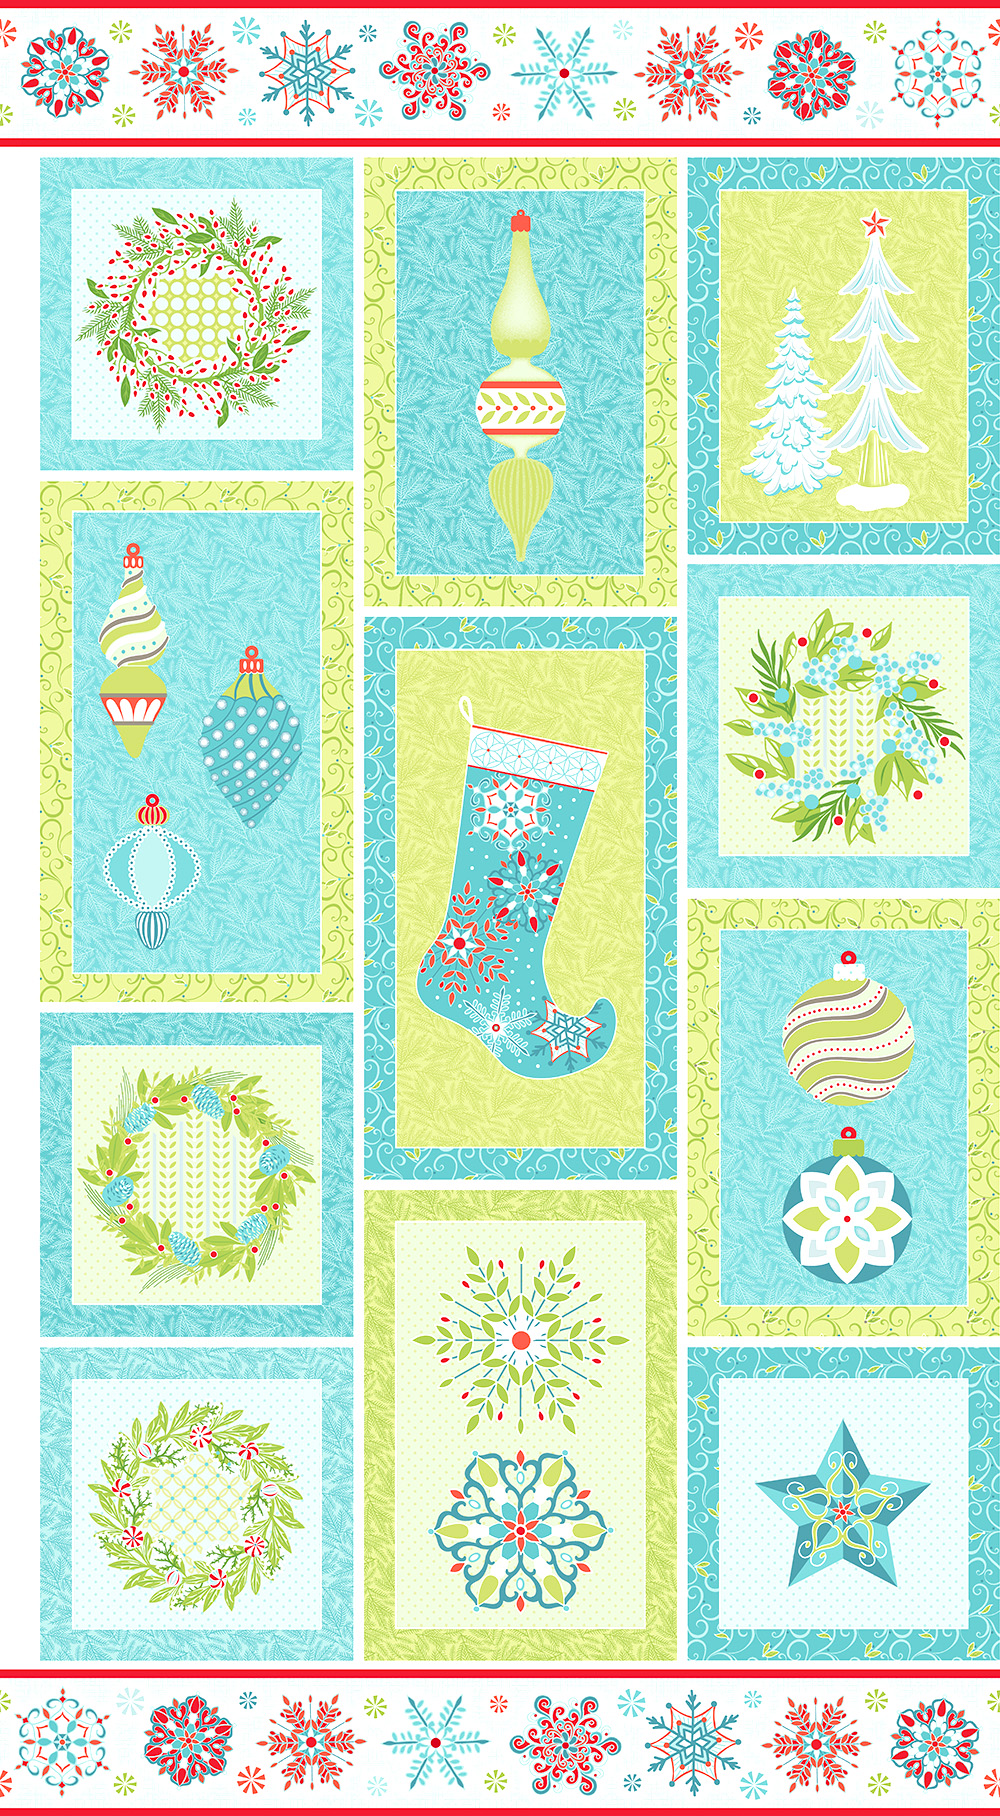
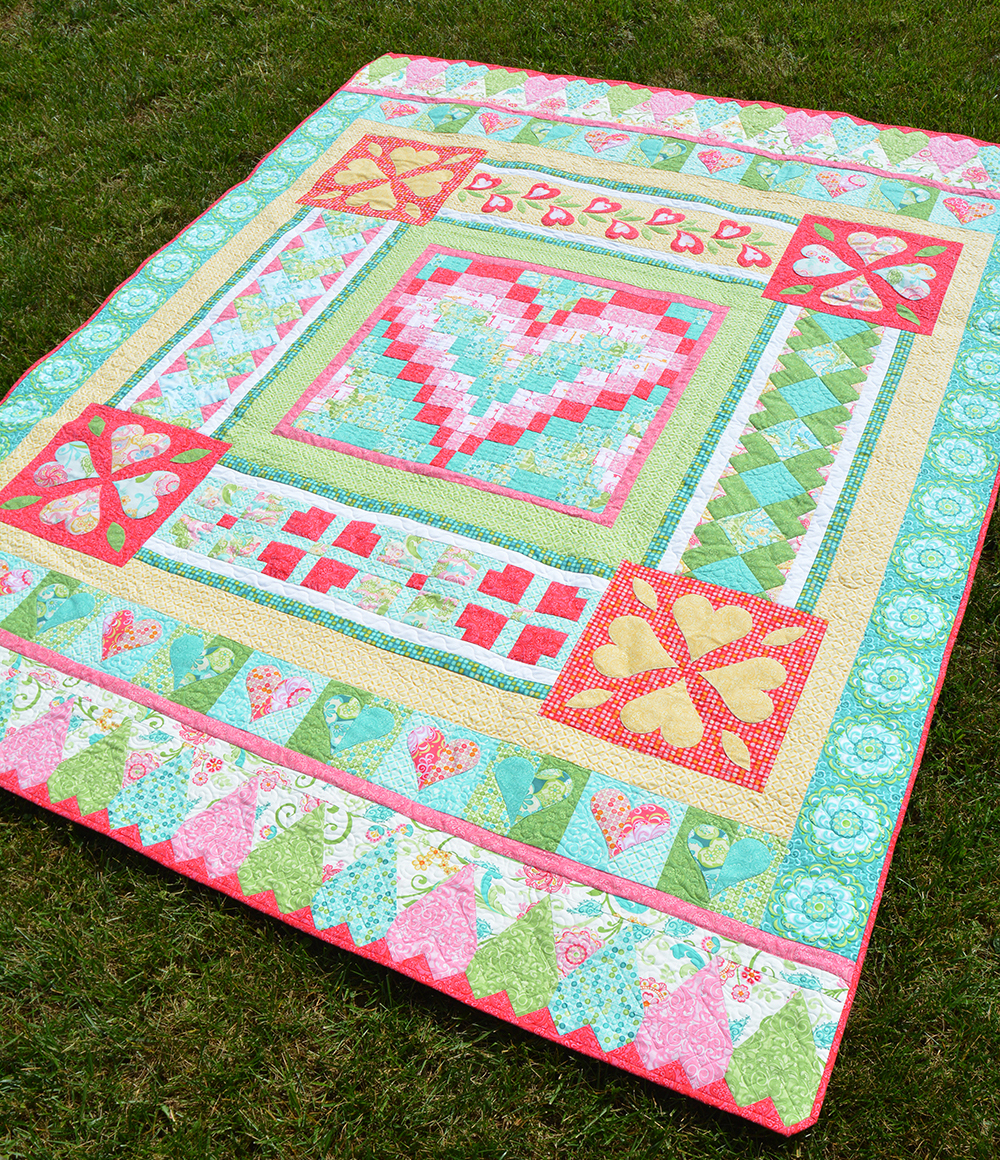
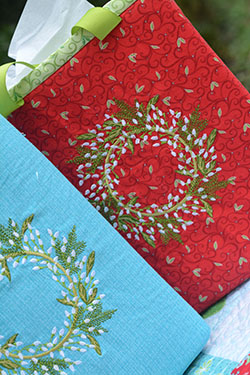
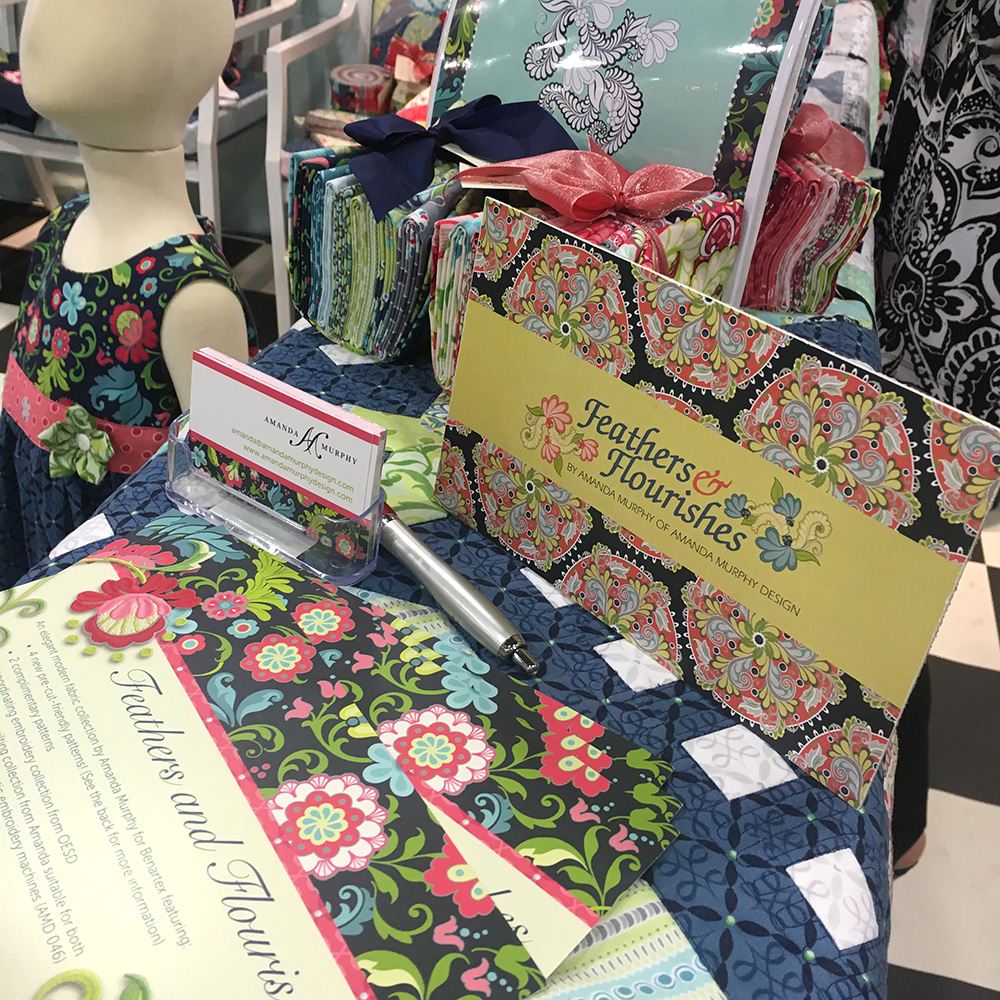
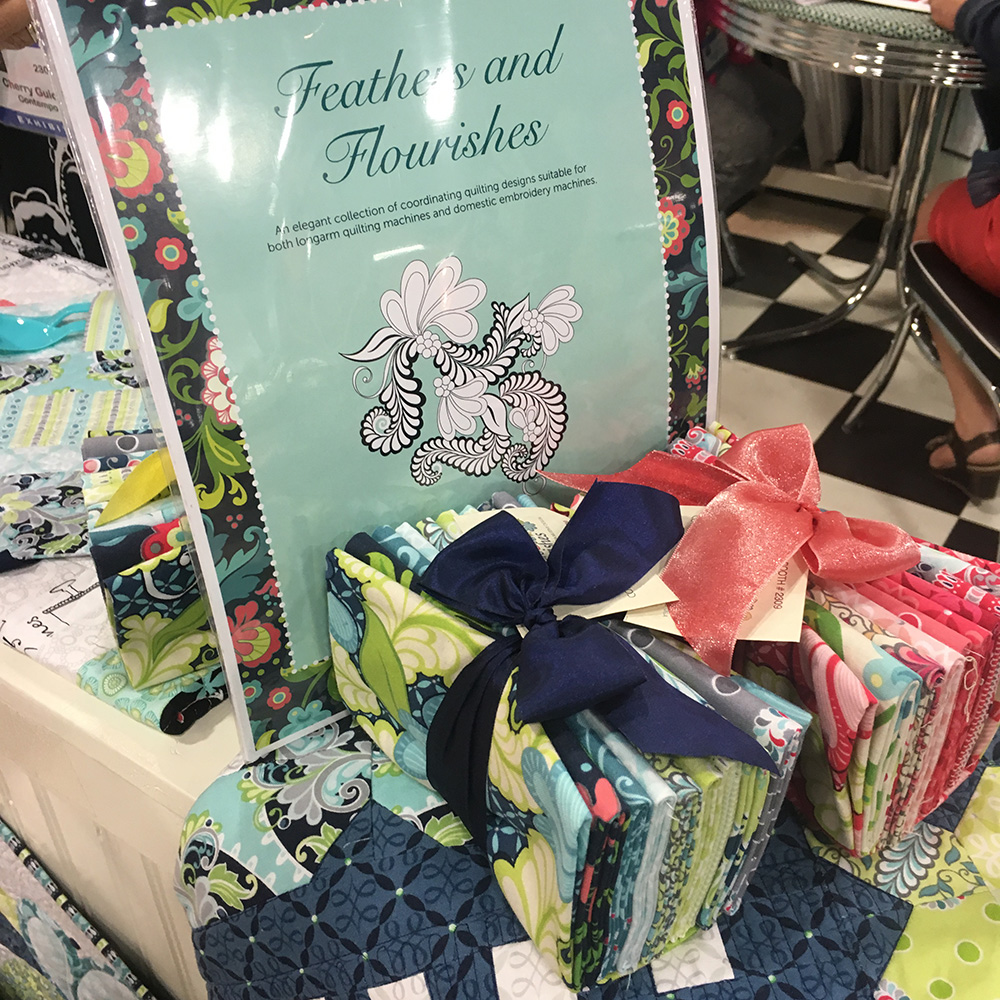
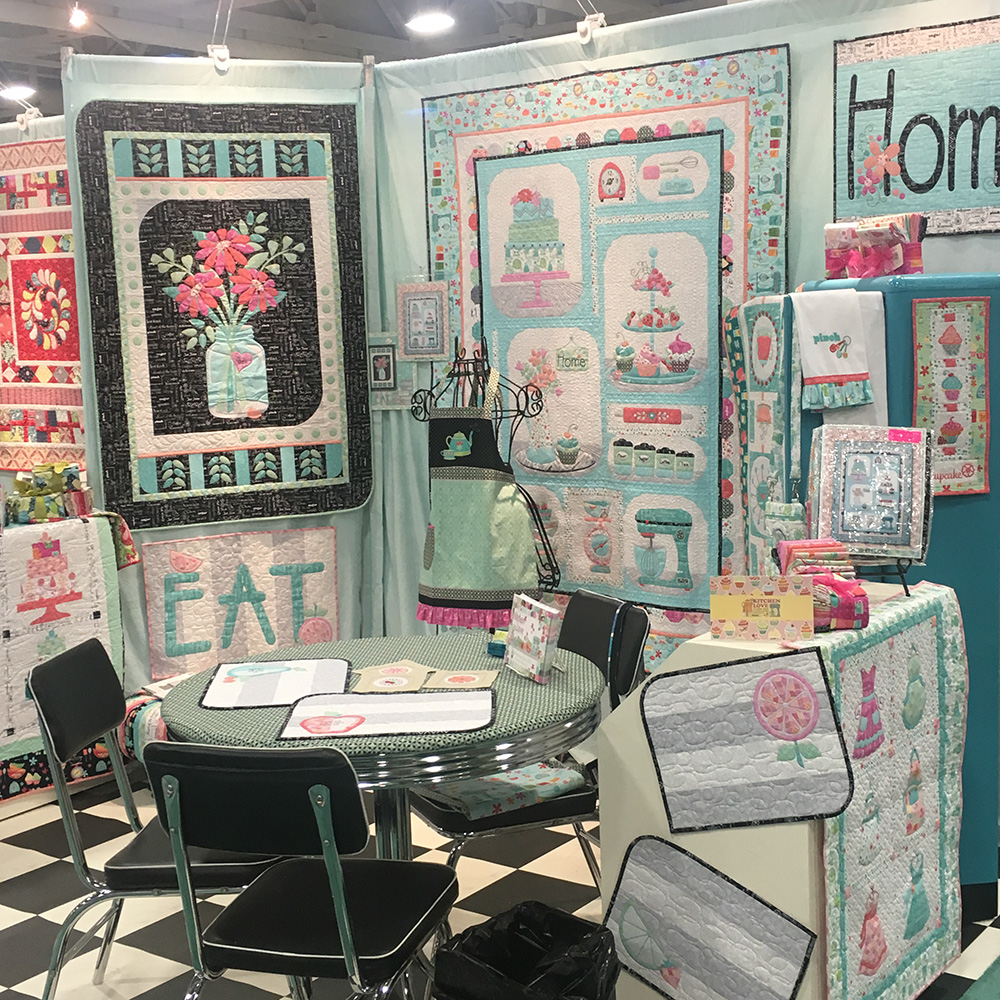
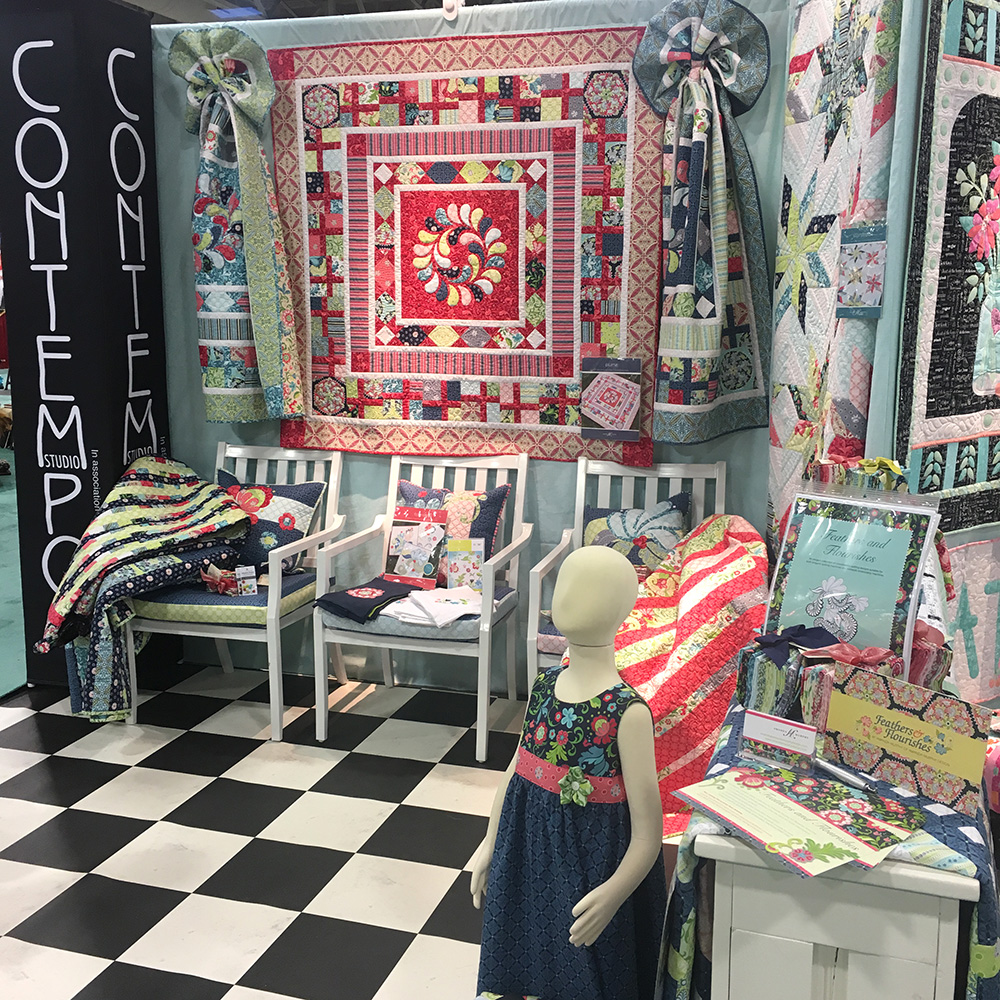
My new collection for the Contempo division of Benartex is called Feathers & Flourishes and it is shipping in July.  It is inspired those shapes that we see so often in the quilt world.  This time my goal was to create a collection that allowed people to really experiment with color.  So I have added a deep navy and vibrant red, along with the greens and aquas that I love.  Consequently, each quilt can look dramatically different depending on the proportions of the prints used.  Here you can see a wider view and a little of my friend Cherry Guidry’s booth next to mine as well.

Market02

Market03

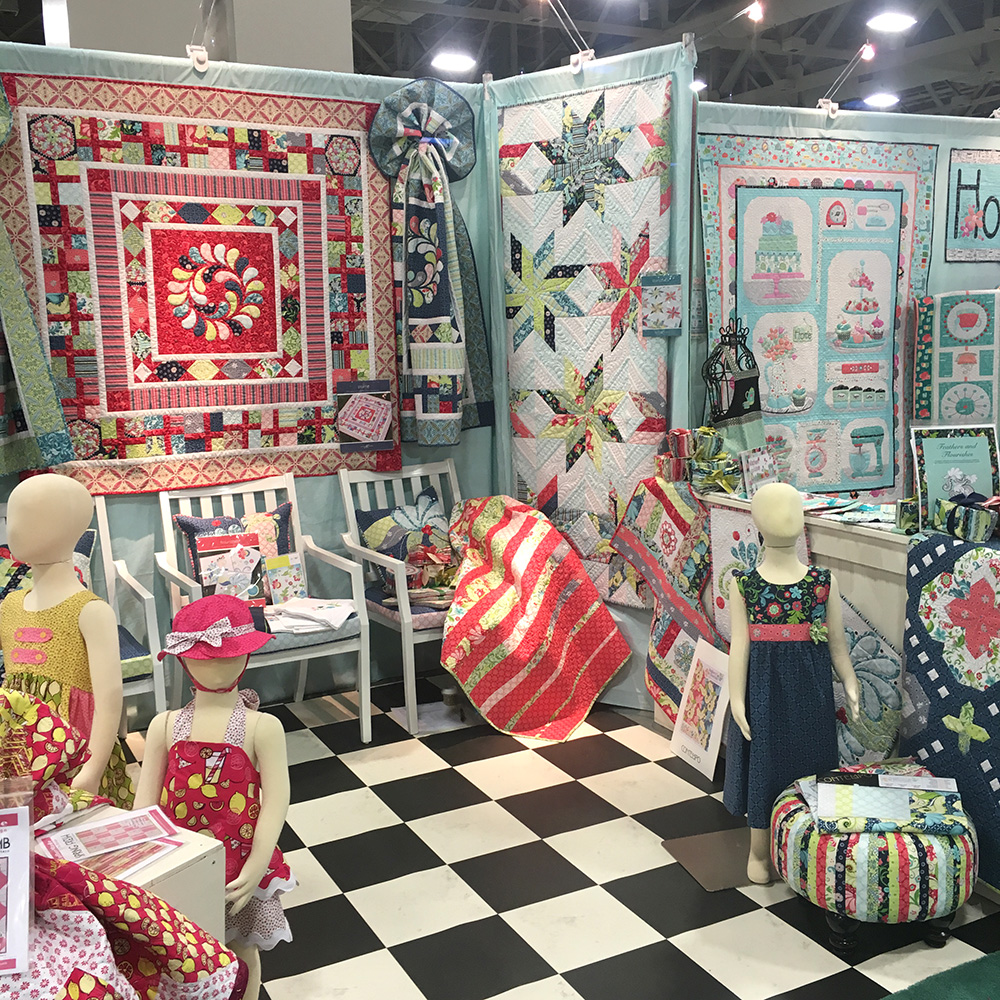
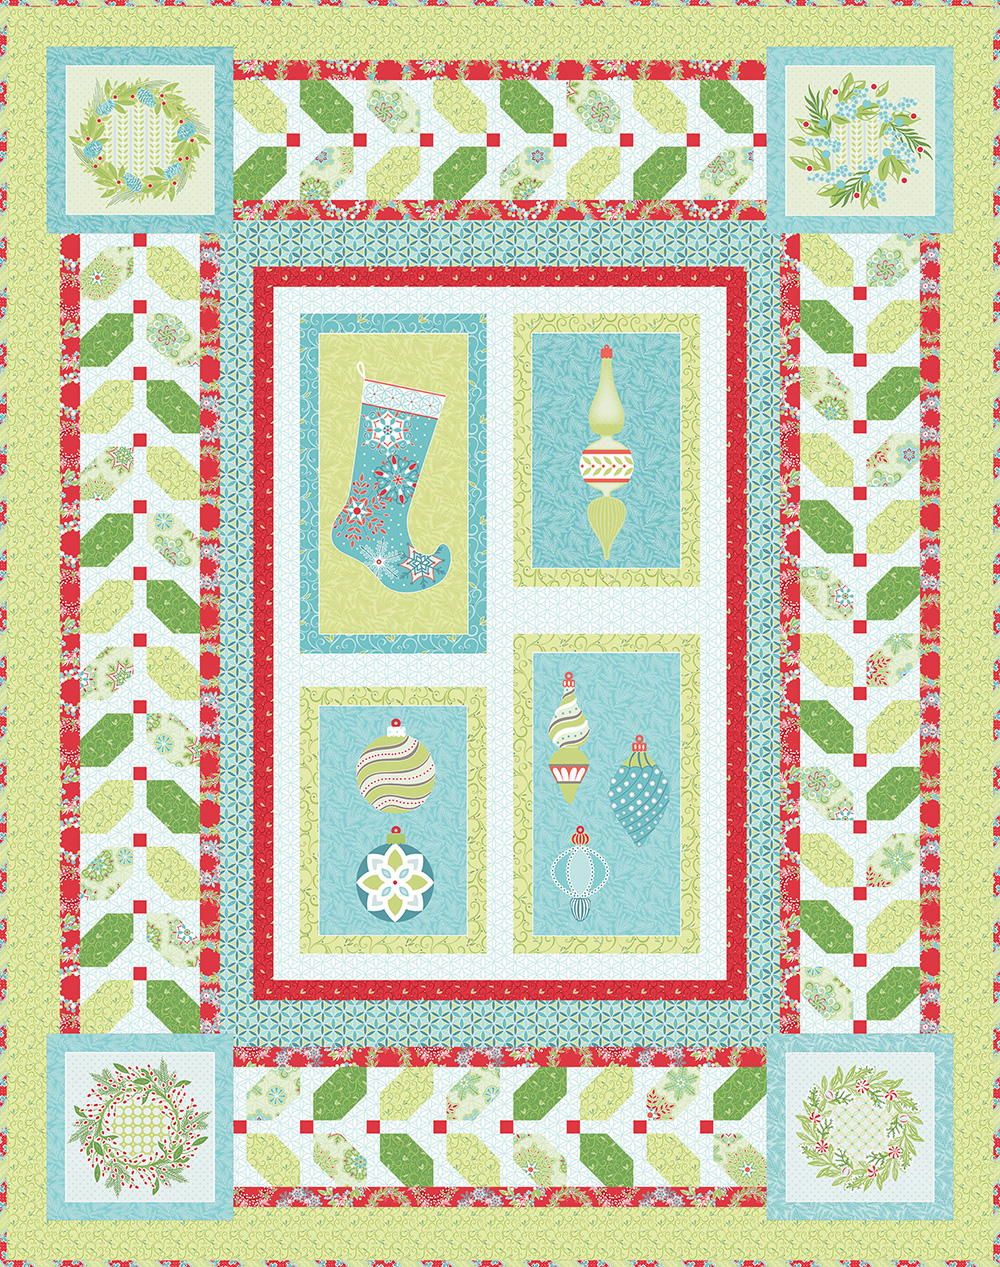
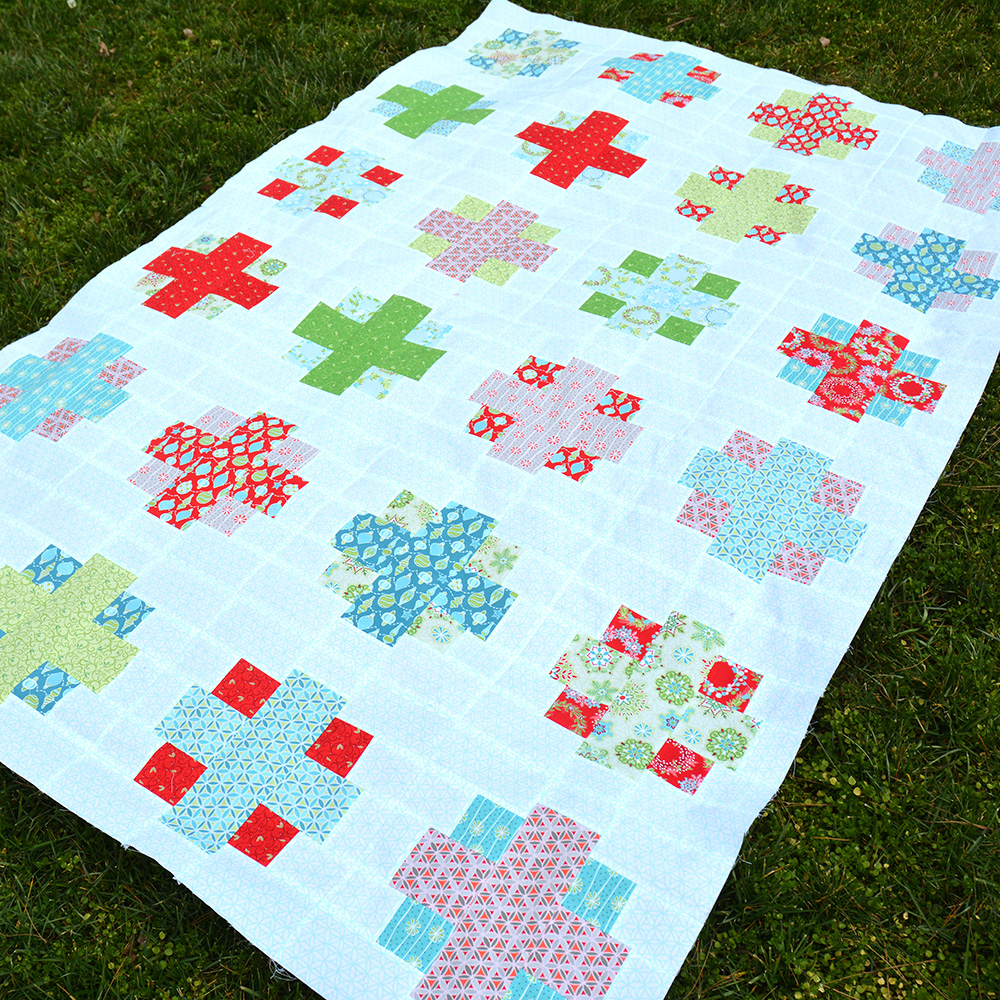
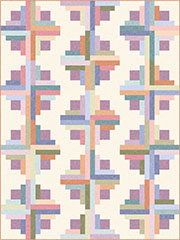
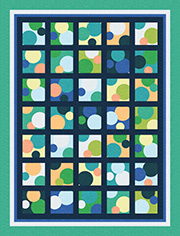
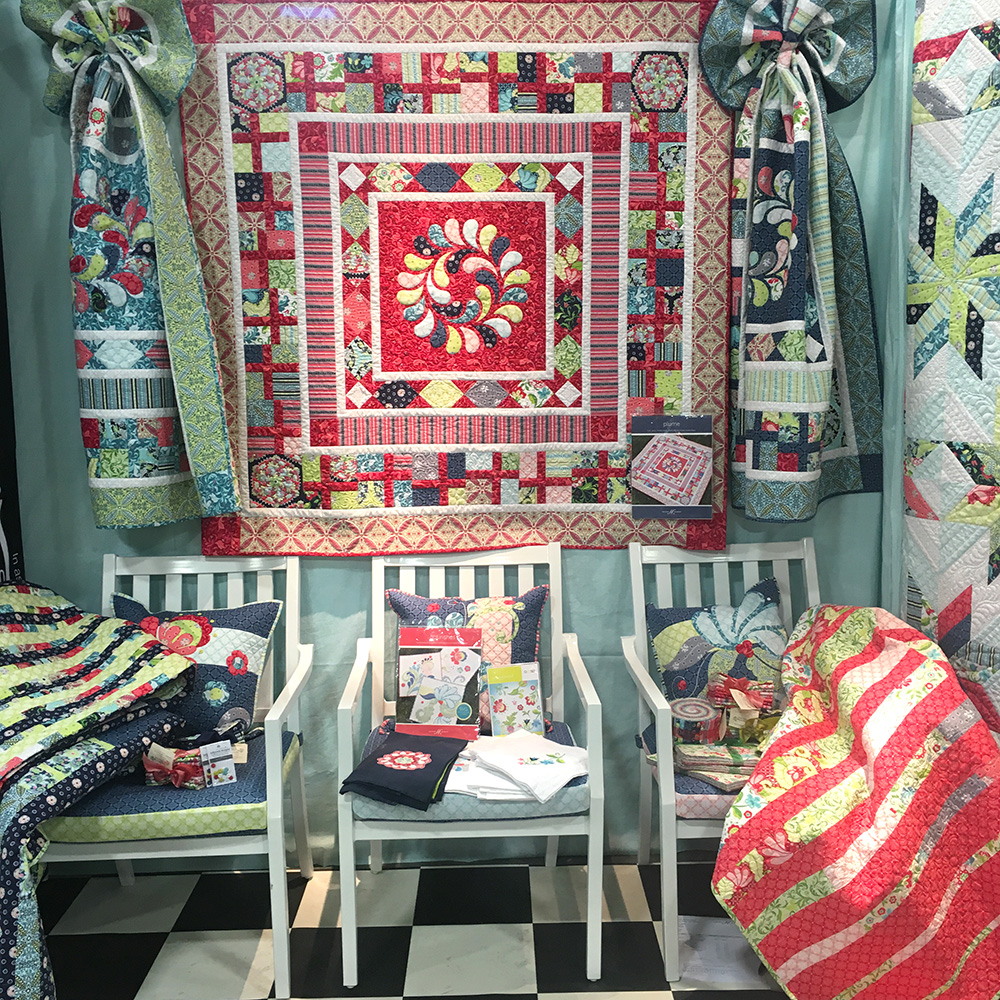
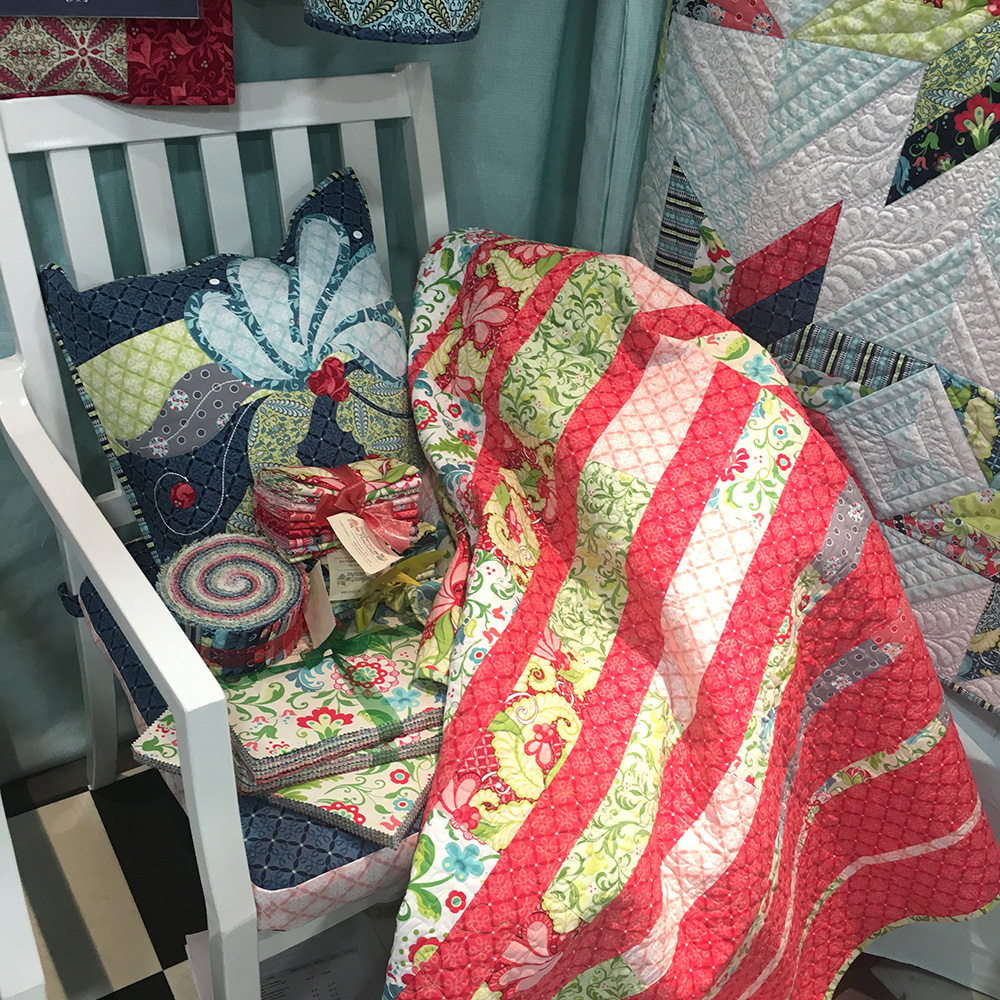
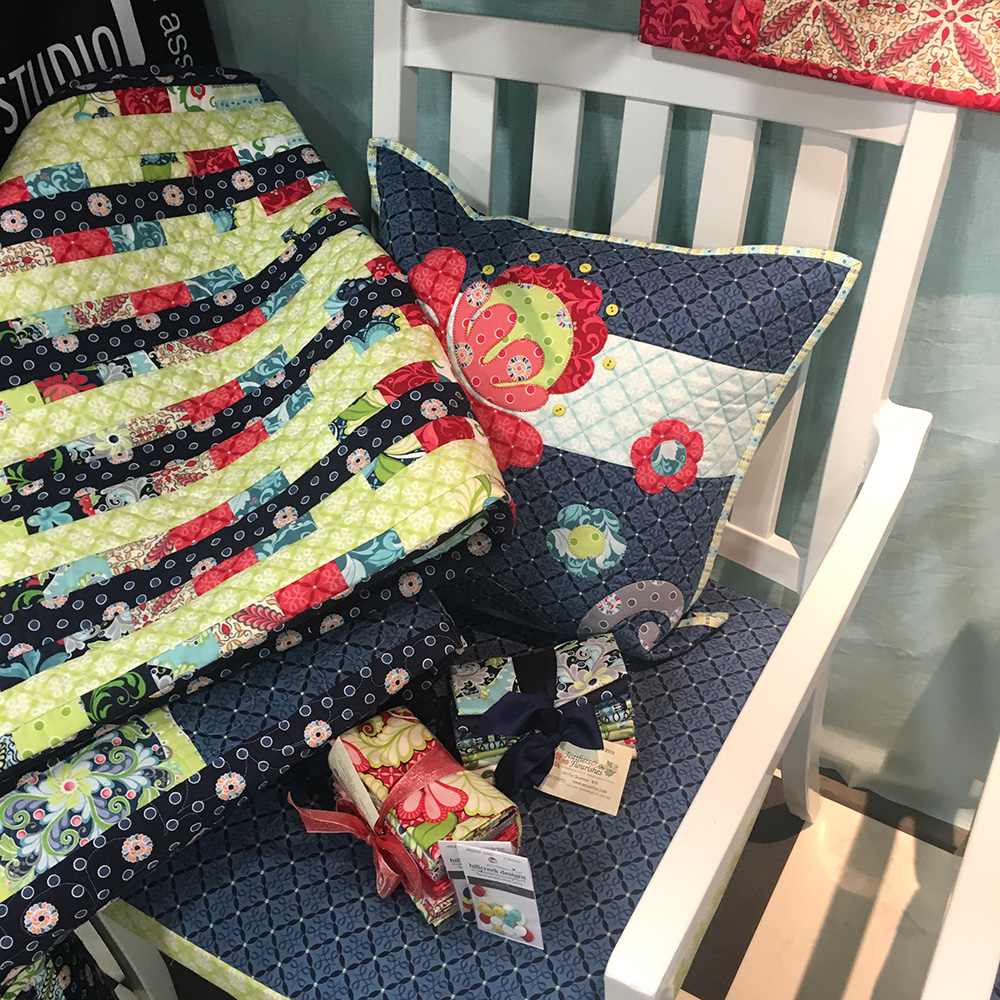
I have 4 new patterns that will be released with this collection.  They will be on my website as soon as I get them back from the printer, probably in a few weeks.  The first is Plume.  This is a REALLY simple medallion quilt.  The blocks are made from a stack of 10” squares so you just change the borders and background to get an entirely new look!

Market04
“Plume” – Special thanks to Traci Adams and Joanne Leonard for piecing the color variations hanging on the sides of the red version!

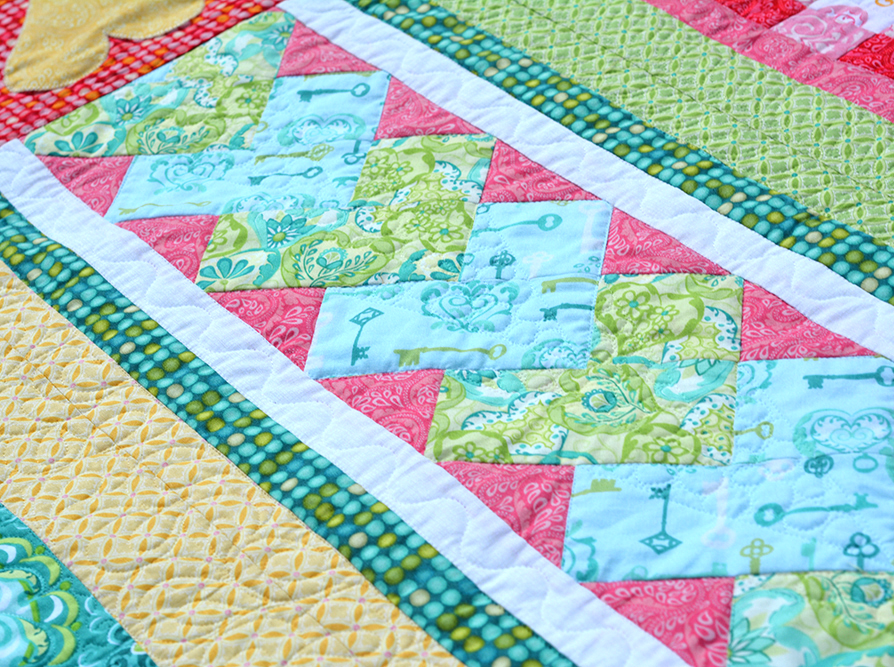
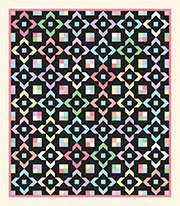
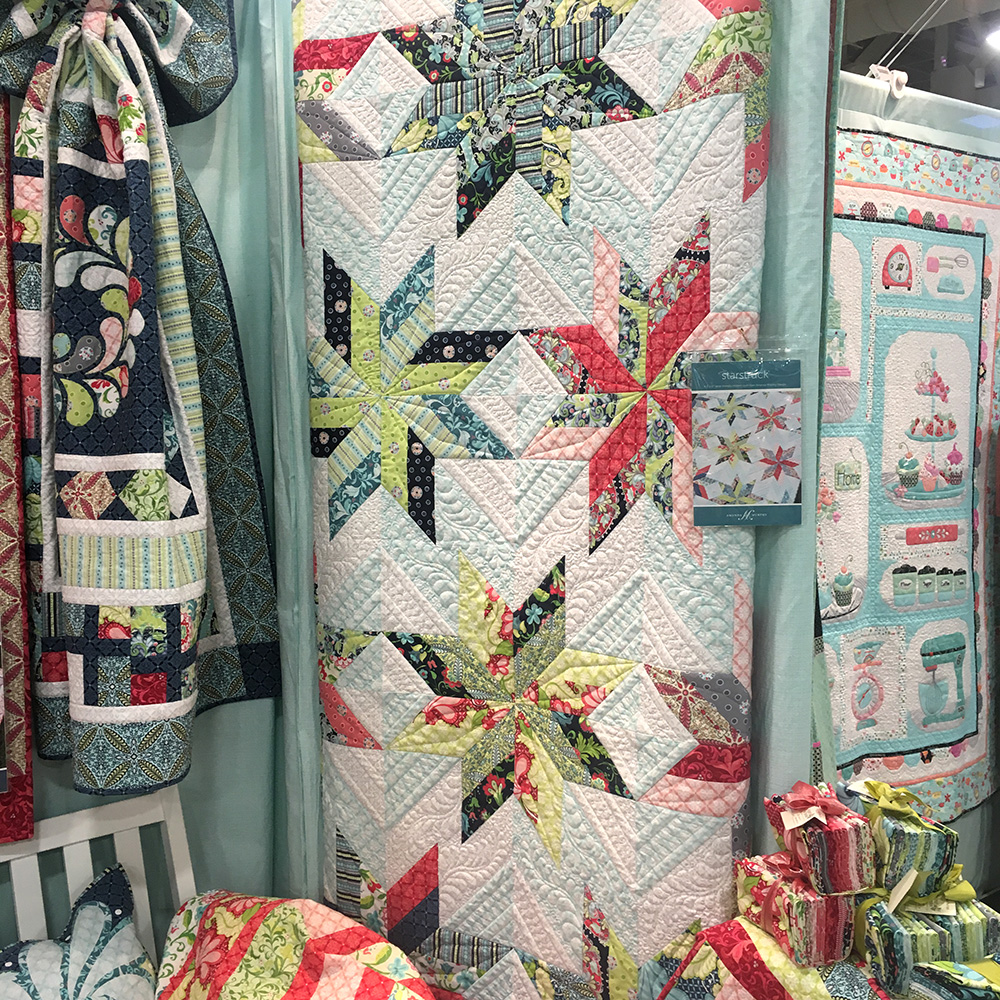
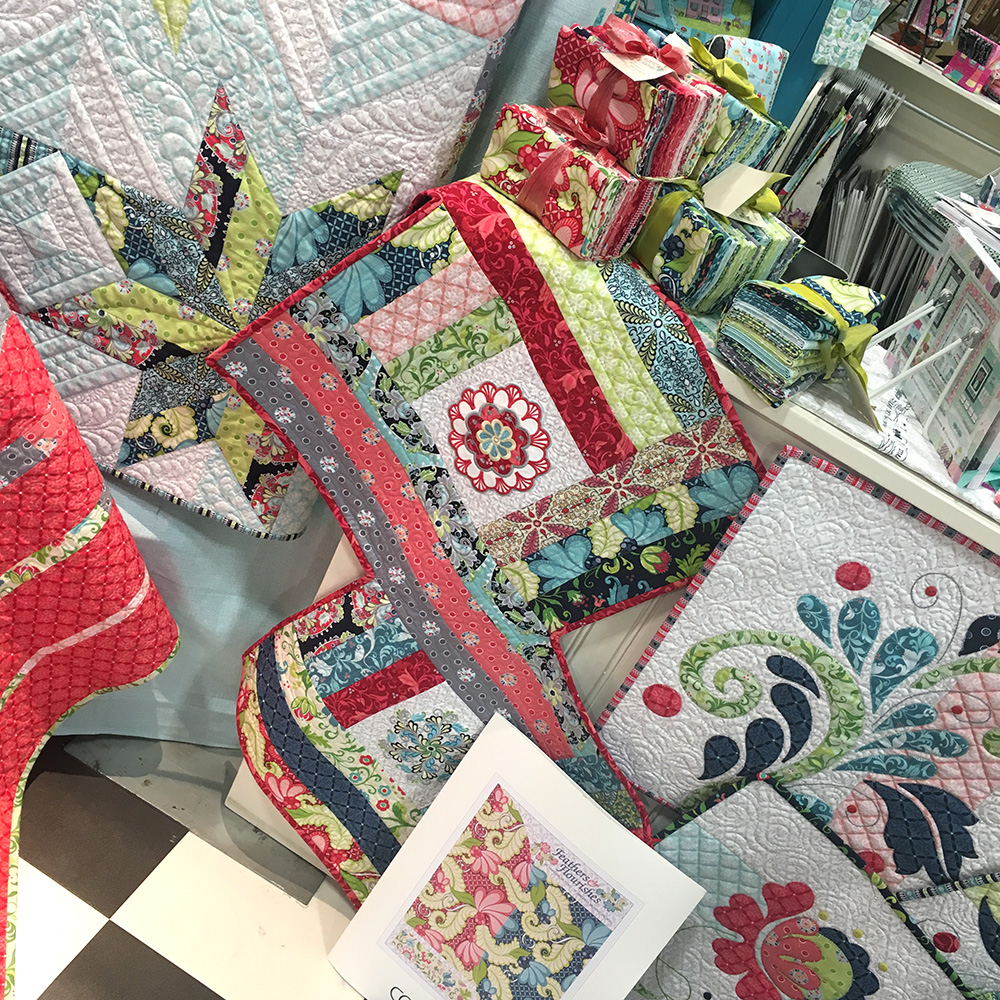
The next quilt is called “Starstruck”.  This one almost never made it off of my computer screen.  It was one of those that really sang in person and even more so once it was quilted so that  the secondary diamond pattern came out.  It was probably the “hit” of my booth so that shows you how much I know… haha!  Oh – and it is made from a couple 2-1/2” pinwheels and two background fabrics.

Market05
“Starstruck”

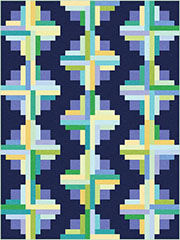
The third quilt is called Posies.  You can only see a little of it here because it is folded up due to limited wall space.  Posies is a fat-quarter friendly quilt and the flowers are on-point – I’ll show you more once I have the patterns back.  I love how different the prints look against the navy background!

Market06
“Posies”, an adorable tuffet from Tuffet Source (thanks for putting it together, Mom, and a cute little in-the-hoop bag from Pickled Pie Designs

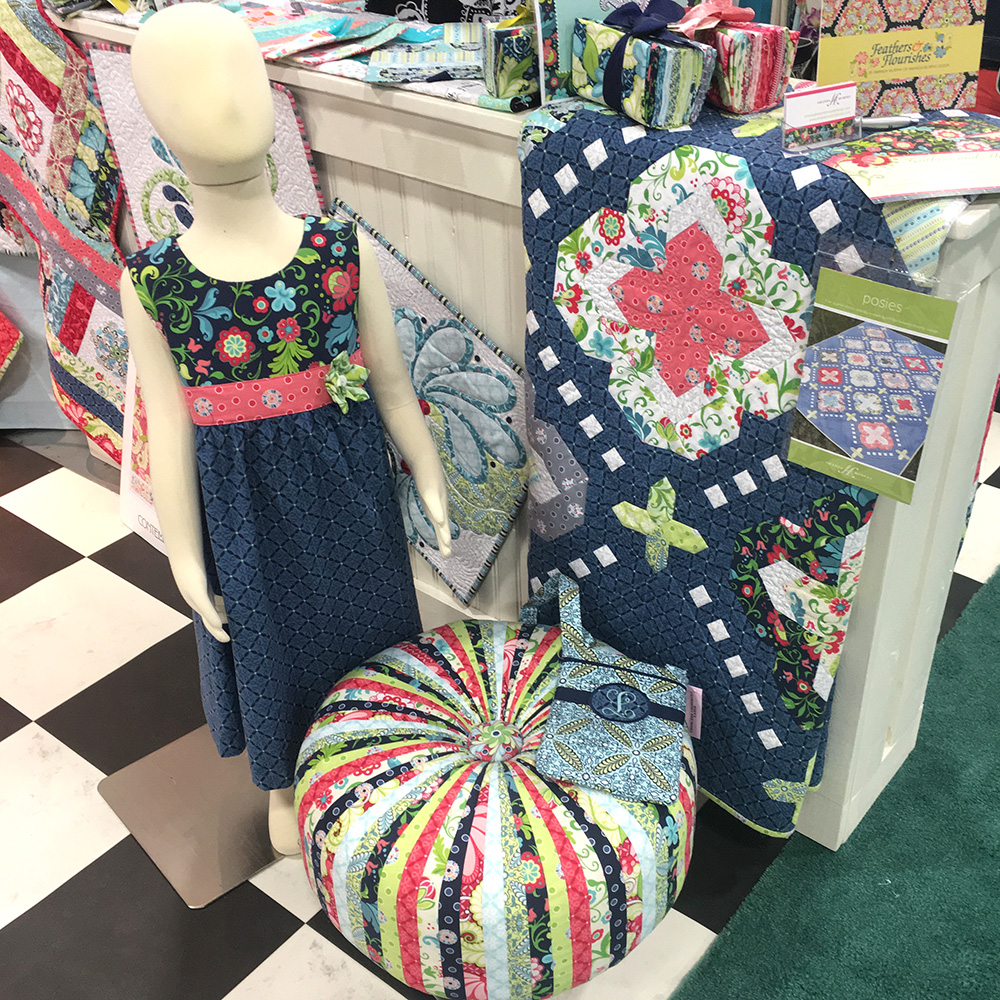
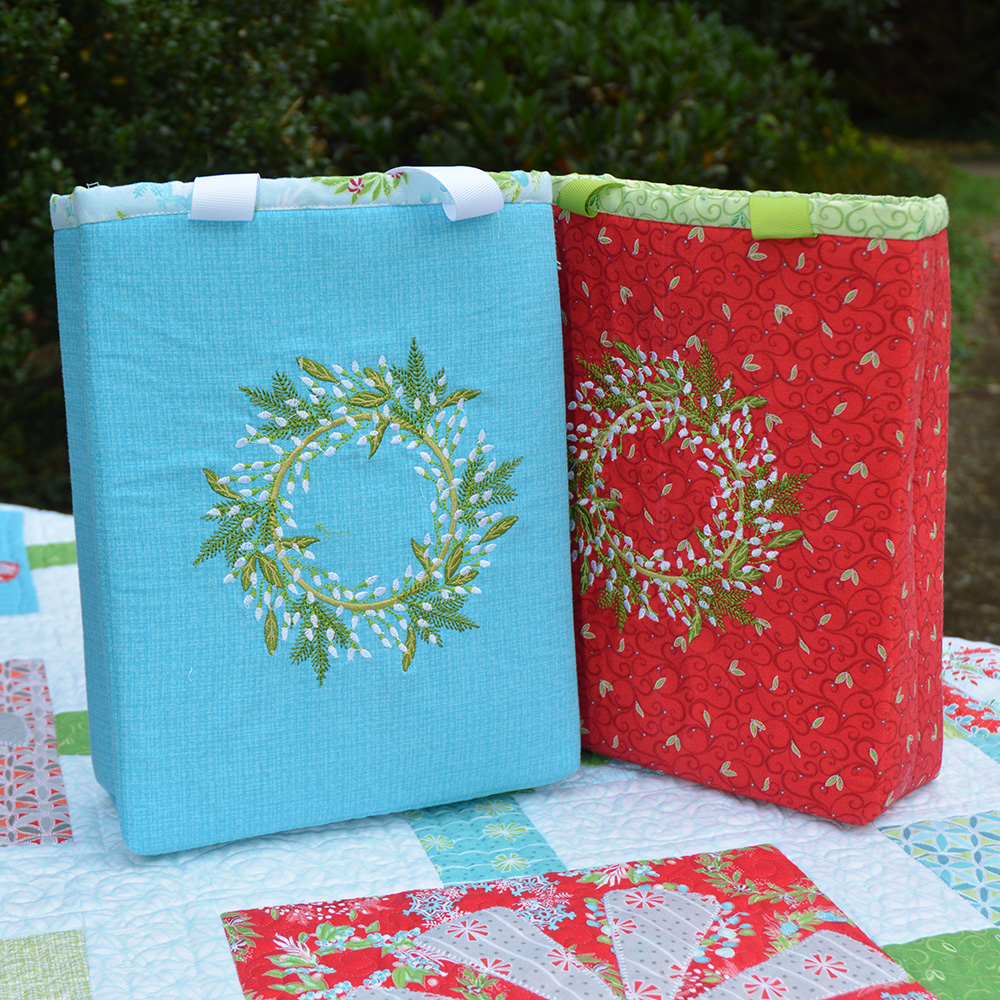
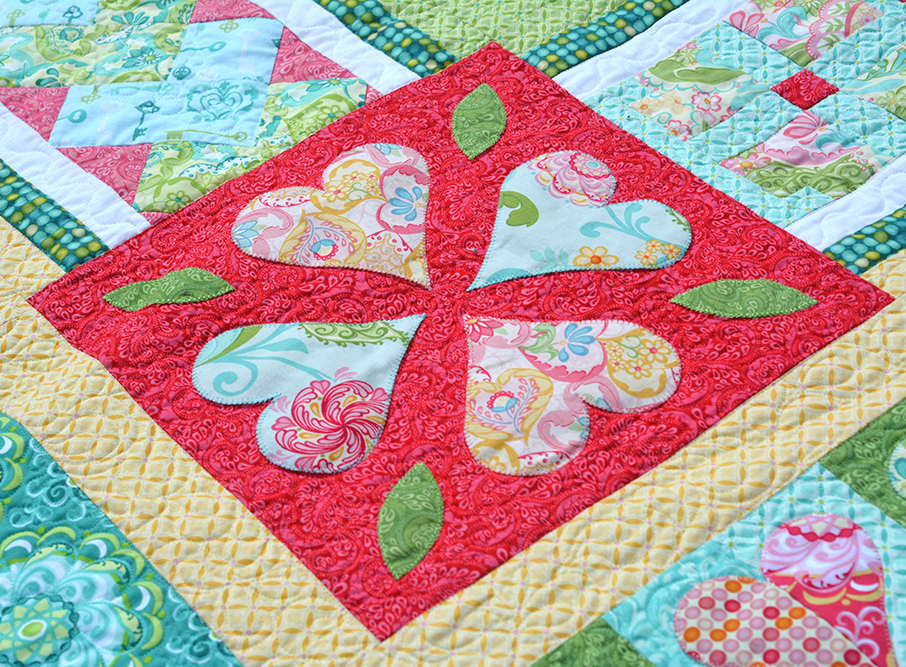
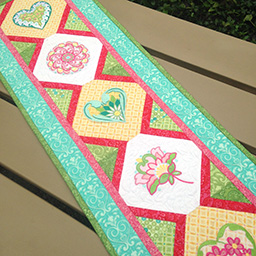
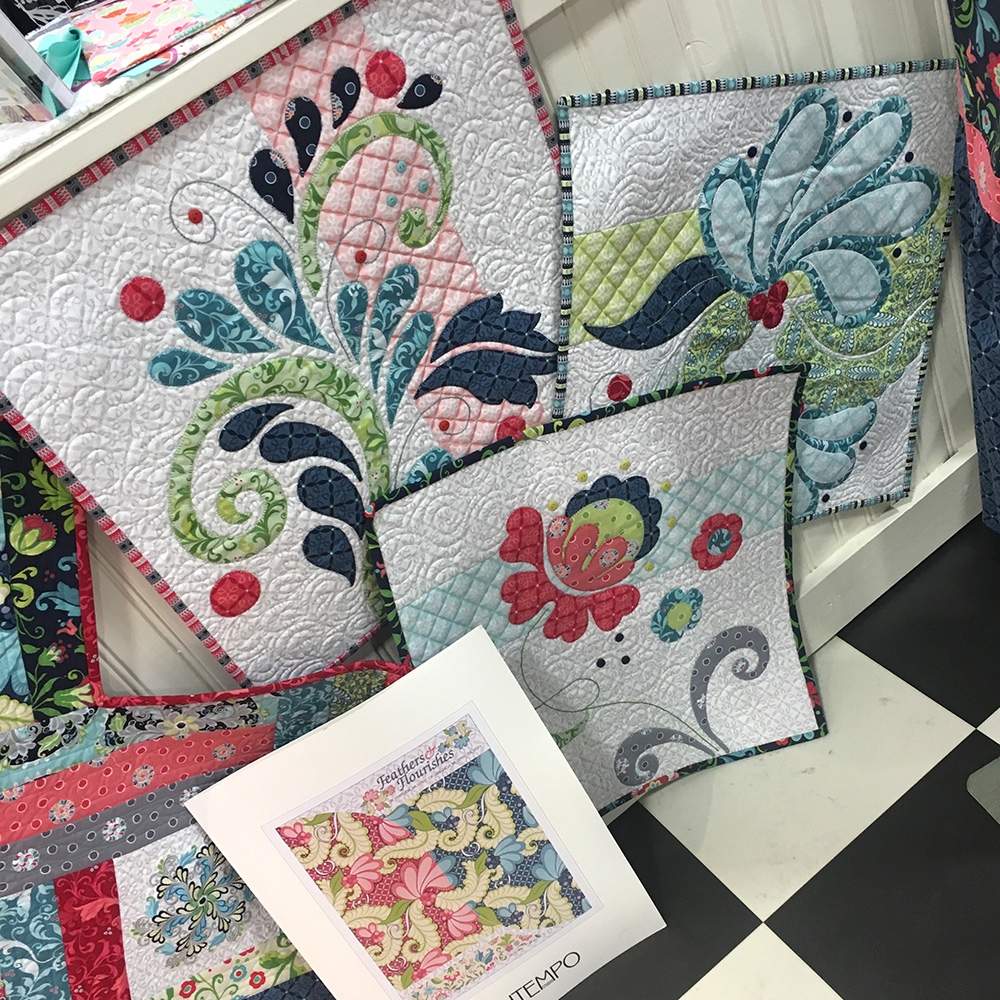
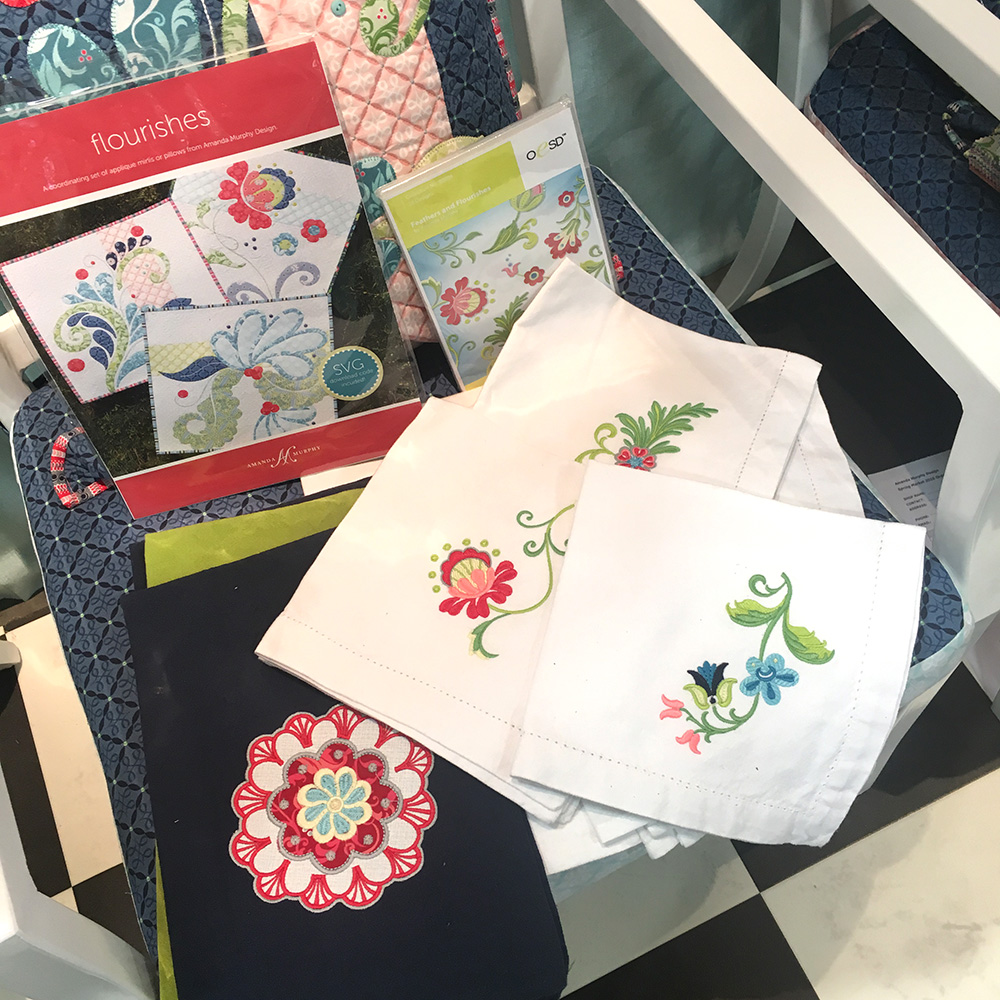
And my final set of patterns is called “Flourishes”.  It is a set of 3 designs that can be finished as a tryptic of min-quilts or a pillows.  There is an SVG option on this pattern as well and Hill Creek (now Just Another Button Company) is producing a button pack for both the white and navy versions.


Market07
The white version of “Flourishes”


Market08
The navy version of “Flourishes”, finished as a pillow and peeking out from behind the precuts and a quilt made from one of the free patterns for this collection.


Market09
To the left of “Flourishes” you can see the free embroidery pattern for this collection that I designed.  The embroidery collection is put out by OESD.


Market11
You can see more embroidery from Feathers and Flourishes here…


Market10
In another corner of the booth you can see a peek of my other free pattern for this collection called “Cinema” – more on that soon!

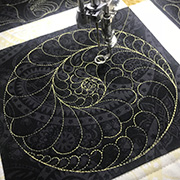
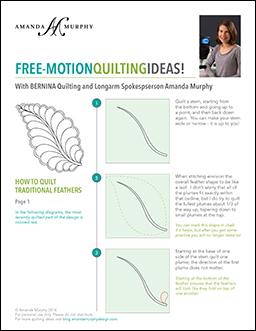
I almost forgot!  For the first time I’ll be coming out with a quilting collection to coordinate with my fabric collection!  So excited as it will be well-timed with the arrival of the Q-Matic system for the BERNINA longarm.  The Feathers and Flourishes Quilting Collection is undergoing testing in June and will be shipping in July.

Market12


Market13
Here is my friend Cherry Guidry’s booth next to mine.  Isn’t it pretty?

So that was Market!  I can’t believe it is over.  You prep for months and then it goes by in a blur.  (Maybe even more of a blur considering we had an emergency evacuation of the hotel the night before we left due to a water pipe break which, when combined with a red-eye home, made for a very hazy couple of days!)

Market14
My booth at Spring Quilt Market 2016 – a final view…

If you love this collection I’d love for you to ask your shop to order it – thanks!

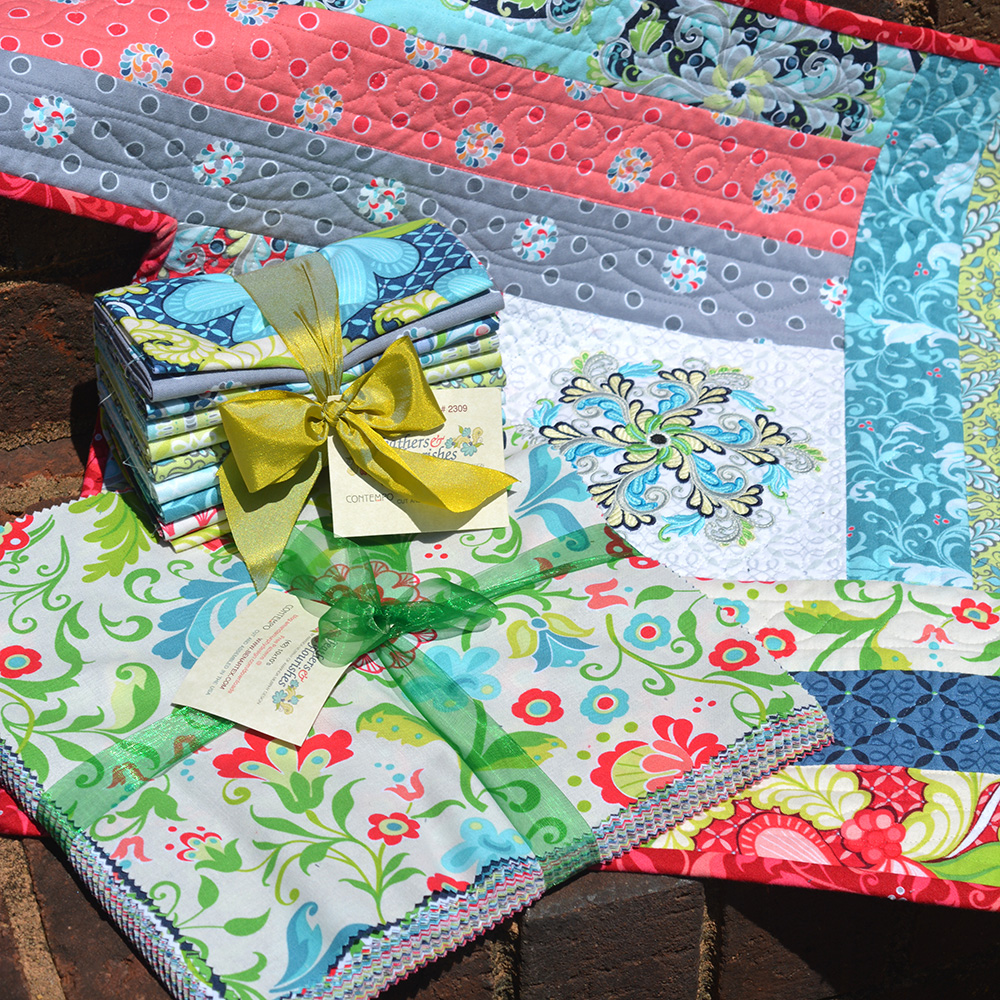
SO if you have actually lasted through all of these pictures (hi Mom!) it is TIME FOR A GIVEAWAY!  Did you see those precuts sitting on the chairs at Market?  I snagged a couple for you guys.  I have a stack of 10” squares and a bundle of 9 fat quarters to give away so leave a comment below telling me which new pattern you like best – Plume, Starstruck, Posies, or Flourishes? Please only enter once and leave me some way to reach you if I can’t see it through your profile.  The last day to enter is Tuesday, May 31st.

giveaway

Thanks for letting me share and have a wonderful Memorial Day!

Happy quilting!

Amanda

Pin It

Complimentary Sparkle Patterns! (and the APQ Quilt Along)

Posted on Leave a comment

Hi everyone,
Sparkle is starting to ship to stores in March so I thought I’d post the free patterns for this collection.  (Click on the captions to have them sent to your email or you can also link to them on the sidebar of my blog or on the downloads page.)

Sparkle_complimentary panel_wallhangingNEW_1000
Sparkle Sampler
Sparkle Runner
Sparkle Runner

Both of them use the Sparkle panel, but different parts of it so you can make both with one cut, plus yardage.  There will even be a couple of blocks left over to make placemats or other small gifts!  Oh – here is the Sparkle panel so you can take a peek….

panel

For those of you who are new here, I also wrote up a free pattern for my Sparkle Embroidered gift bags.

Sparkle_bags

And the other Sparkle patterns are in my shop.

All Sparkle patterns

And for those of you who are participating in the APQQuiltAlong – isn’t it fun?  I haven’t started quilting but I did manage to get my Easy Addition Sparkle blocks (pattern in the most recent issues of Quilts and More) pieced together. It was super-fast-and-easy – so much so it felt like I must be cheating!

EasyAddition_pieced1

Hope everyone has a wonderful weekend!  Happy quilting!

Amanda

Pin It

Heart’s Delight Quilting

Posted on 3 Comments

Hi everyone,

Hope you are having a lovely fall!  I’ve been teaching a lot of quilting on the BERNINA Q Series quite a bit over the past couple of months and I usually bring a trunk show along with me.  One of the questions I get asked most is how I chose the different quilting motifs on Heart’s Delight, my block of the month for Carina. So I thought I’d take a minute to tell you more about the process.

036HeartsDelight_01

I do usually start out with a general quilting plan, but I frequently change things alone the way.  So, I knew that I, in this case, I wanted to use paisleys and petals and soft shapes, but contrast them with straight quilting lines as well.  Just like the piecing really.

The first thing I decided was the thread color.  I like quilting with Aurifil 50 wt. cotton but time was of the essence (after all, it was less than a week until Market) so I opted for Aurifil monofilament in the  top and Aurifil 50 wt. in the bobbin so that I wouldn’t have to change out colors.  I have a large spool of the monofilament that I use both on my BERNINA Q24 and on my 780.  When I use it on the 780 I like to use a thread stand to let it unwind, but it works well on both machines.  I really love the Aurifil monofilament – it is soft and pliable and not shiny at all – it just sinks into the design.

I started out by stitching in the ditch around all the blocks and elements on my first pass.  I stitched in the ditch and added some of the larger fills as I worked down the quilt, but I only added the smaller fills once that process was completed.  (For more information on fills see my Free-Motion Quilting Idea Book.)  If I had been quilting on a domestic machine, I would have chosen to stitch in the ditch between all the blocks and around the appliqué motifs, etc. and then added in the fills with my free-motion foot after.

So… block by block my quilting plan evolved a like this:

I decided to quilt the central bargello heart by stitching in the ditch on every seam.  This really emphasized all of the piecing plus it contrasted nicely with the curving shapes I knew that I going to be adding elsewhere in the piece.  Another consideration was that a more wavy design would have been hard to execute cleanly in this area, because even the slightest shifting in the seams would have been noticeable.  I used my BERNINA Q Series Ruler Attachment to quilt clean, straight lines.

036HeartsDelight_02


Moving from the center out I chose to quilt a sort of leafy vine in the green area.  I quilted a spine around the entire square and then went back and added leaves to the left side of the spine and then to the right.  I did not mark this since our eyes are very forgiving of leaf shapes in general – plus I knew it would be hard to see my mistakes on the print!  I left the dark teal frames unquilted so that they popped up a bit, and quilted wavy lines in the white areas, using my ruler foot and a ruler again to ensure uniformity. Quilting a white area will draw your eyes if you have lots of fun fabrics in other areas!  (Ask me how I know this!  Rip rip rip!)

Do you see the diamond border in the lower right hand corner of the above photograph?  I choose to bounce from corner to corner of each diamond with a petal shape and fill the interior area with pebbles.  Petal shapes are so useful. You can use them in their entirety to create a medallion or a four petal blossom, or you can use just half and bounce from corner to corner of a design.

036HeartsDelight_03I quilted around each shape in the yellow appliqué border above the bargello heart and then filled in the background small scale paisley design.  I love paisleys for the back of appliqués – they are really quick to execute and fit well in a variety of spaces.

036HeartsDelight_05

I divided up the hearts in the left border by connecting the two top points of each heart with the bottom point of each.  I then filled in the resulting shapes with pebbles.  (If you use a fill in one area of the quilt it is nice to repeat the same motif in other areas as well.)  I don’t think that quilting designs have to follow the piecing exactly – sometimes it is more fun to use the piecing as inspiration and add another layer of design during the quilting!

036HeartsDelight_04


You can see just a hint of the bottom central border in upper right of the above photo.  I quilted around each flower and filled in the background with simple ribbons.  For the cornerstones, like the pink one in the photo, I simply quilted around each motifs and then did a background fill.  I think I started with hearts, but I couldn’t see anything on the dark pink, so I ended up migrating to a medley of swirls, hearts, and pebbles – or whatever I felt like in the moment that would let the appliqué pop!  I figured if I couldn’t see while quilting neither could anyone else.

I quilted a medium scale paisleys in the yellow border.  What can I say?  I REALLY LIKE PAISLEYS!

On some of the above you can see a glimpse on the side border with the teal Carina medallion quilt.  For medallions I like to let the print do the work for me.  I quilted around each, and then traveled into the center and went around the circle, and then followed the petal shapes to quilt “feathers” all the way around before exiting the way I came in.  (I have some video of this down in my instagram feed that I took at the time. If interested you can check it out – my user name is AMANDAMURPHYDESIGN.)

The top and bottom inner heart borders were quilted much like the cornerstones.  I quilted around each heart shape and filled in the background.

036HeartsDelight_06

I stabilized the top and bottom outer border, pictured above, by quilting all the way across the top of the hearts and all the way across the bottom of the hearts.  I then quilted echoed lines within the hearts, leaving a smaller heart shape.  I filled these shapes with a fishbone motif.  And I could go right across the quilt without stopping because the motifs were connected and I was using monofilament thread!  Finally, I willed in the white floral print area with swirls.  Yes, I thought about paisleys because I REALLY LIKE PAISLEYS but I threw caution to the wind and went for swirls instead.

And that is how I quilted Heart’s Delight!  If you are quilting it send me a picture – I’d love to see!

Have a lovely weekend and happy quilting!

Amanda


Pin It