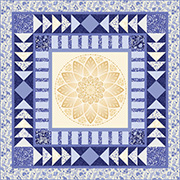
Now where were we? I have the border of my quilt complete and am ready to attach the prairie points. I had calculated that the beginning of each prairie point should be about 4-1/4″ away from the beginning of the previous point at the seamline. Since I am going to use a 1/4″ seam to attach the points, that means that they will be slightly over 4-3/4″ away from eachother at the raw edges. I lay my first point adjacent to the quilt as pictured below. (I find it easiest to have the edge of the point that only has one fold be the one that will feed through the machine first, so in this case I am putting it on the right.) I want the end of the first point to overlap the edge of my quilt by 1/4″ so that it will be flush at the seam.
I have to take that 1/4″ overhang into account when I am placing the second point, so instead of measuring 4-3/4″ out from the edge to place my second point, I will measure 4-1/2″ from the edge and make a tiny pencil mark on the edge of the border. I continue making marks slightly more that 4-3/4″ apart until I get to the center of the quilt. I lay my second right up next to the quilt, lining the left end up with the second pencil mark, making sure that the edge with only one fold is again on the right.
I continue laying out points, until I get to the center of the border. If you have an odd number of points, the “point” of one of them will (hopefully) line up with the center of the border, or close to it. If you have an even number the intersection of two points will line up with the center of the border. If it is off don’t panic – just keep adjusting until you are pleased with the placement. Once satisfied, continue placing points until you get to the end of the border.
Turn the points over onto the top of the quilt and pin.
Sew the prairie points onto the quilt with a 1/4″ seam and press out, pressing the seams toward the center of the quilt.
Now for the most important part:
Whether you quilt yoru piece yourself or give it to a quilter to finish, make sure to keep the prairie points out of the way while it is quilted and do not quilt within 3/4″ of the prairie point seamline!
Until next time!
Amanda